Congratulations on reaching the end of your long journey! If it’s heavenly amounts of loot you want, well, you have to work two, three notches harder for it in Final Fantasy XIV: A Realm Reborn. Sure, farming resources and selling them can give you a couple of cheap FFXIV Gil within a much shorter span of time (minus the ridiculous amount of effort), but there’s something so fulfilling about reaping the rewards the hard way. And by ‘the hard way’, we mean completing dungeons and kicking world bosses’ butts. Nothing quite beats that feeling when the boss falls and drops insane Final Fantasy XIV Gil rewards. For today, we’ll guide you through the second part of the world boss encounter against Bahamut Prime.
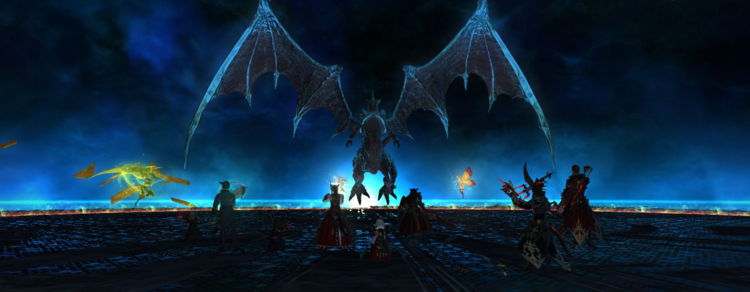
Phase 2: Bahamut Prime for FFXIV Gil Hunters
In case you missed it, here’s the guide to the first phase of the Bahamut Prime world boss encounter. For the second phase, you’ll have to apply all you’ve learned in the game so far about proper add handling. Bahamut Prime will summon adds called SHADOW OF MERACYDIA, which are hard-hitting adds that should be Virused immediately—preferably BLM or WHM. Two sources of Virus can tag all 3 dragons. These adds should be tanked away from Bahamut to prevent a tether forming between them as it gives DEF+ and DMG+ to both Bahamut Prime and the adds (that would be unpleasant, yeah?). Note that these annoying ones will spawn around a minute apart from each other; hence, Rouse and Divine Seal would be ideal to use. Now, you might want to use up your Limit Break sometime during Phase 2. Melee LB on Bahamut Prime is recommended, but carefully plan it out before simply executing it. The important thing is to wipe your LB bar during the middle of the battle in Phase 2. Melee LB1 or LB2, and save up LB3 for Last Bastion later on. You don’t need to excessively use LB. You might also opt to use Eye for an Eye on Bahamut once the adds spawn.
Abilities: Bahamut Prime for FFXIV Gil Hunters
Bahamut Prime will use FLARE STAR to create several balls which are tethered to players around the room. The balls will slowly move towards their target for several seconds, and then very rapidly after additional time. Each ball that hits a player will explode and add a stackable debuff (AoE), which increases damage taken from his next skill. Every member of the team should aim to only have 1 ball debuff (as it is virtually impossible to not get hit anyway). Being hit by 2 balls can be difficult to recover from, while being hit by 3 is an ensured death. There should be 3 sets of ball phases before the phase change at 52%. The amount of balls which spawn and tether differ per wave; however, set 1 will always have 7 balls, set 2 will have 8 and set 3 will have 10.
The said next skill is RAGE OF BAHAMUT, a room-wide AoE damage that increases, depending on how many stacks of the Flare Star debuff a player has. BLM Apocatastasis is the best way to support a raid member who has two stacks. Otherwise, full HP through pots when you buy FFXIV Gil, and shields would be good enough. Sacred Soil should be of some value here, since it happens right after Megaflare. Stacking up for Cure III is the most value you’re going to get though, so make sure you have plenty of MP and be ready to cast it when needed.
Bahamut Prime will also execute his FLATTEN ability, same as Phase 1, but only 1 FLAME BREATH will follow.
Had enough of MEGAFLARE? Too bad. Megaflare will return from Phase 1, but with an upgrade. Each Megaflare now comes with a pylon. This pylon will spawn on a random raid member, and must be absorbed by somebody by standing within the pylon’s circle, taking in the moderate damage. If not, it will explode and deal a massive AoE damage to the raid plus a Bleeding debuff which will ultimately lead to a wipe. You have to stay in the tower until you hear the explosion and see the visual effect!
Counter-Tactics: Bahamut Prime for FFXIV Gil Hunters

Phase 2 is a continuation of Phase 1, but this time with adds, plus less damage on the main tank of your raid. AoE damage on the raid is pretty heavy during this phase, which is why it is critical to have everyone avoid the ball damage, before going into the Megaflare and Rage of Bahamut casts. The key to surviving Phase 2 is minimizing debuff stacks from the Shadow Flares and eliminating the adds quickly before they form tethers; hence, your team must be well-communicated with and well-aware of how to move and position themselves throughout the encounter. At 52% the phase will transition with a Gigaflare, and Bahamut will fly up and become untargetable. However, Bahamut can still be damaged during the Gigaflare channel and can be brought down 2-3% during this time. DPS members should focus on minimizing debuffs and damage taken from the balls. Tanks should mitigate as much damage as possible: if possible, a PLD can Stoneskin party members who have two stacks of debuffs. The offtank must then quickly pick up adds and position them, while mitigating damage as they go. The tanks should try and grab ball debuffs to ease raid damage. Simultaneously, healers should focus on mitigating damage from Megaflare into Rage of Bahamut, and create healing assignments for the offtank and main tank as necessary for the raid. Note that damage towards the off tank is high in this phase, so healers should pay extra attention to them.
In summary:
- Make sure the tanks are always above half health for the next deadly drive.
- Stack up on recovery and utility pots when you buy FFXIV Gil, as well as on Cure III.
- Direct the adds far away from Bahamut Prime to avoid the +DEF and +DMG buffs.
- No one should take more than two orbs!
- Scholars should use the time during the Flame Breaths to Succor the whole raid, and cast Adloquium to anyone with two stacks of more.
- Watch out for the pylons during Megaflare, and make sure any one of the members (preferably those with high HP) stand on the pylons’ circle to prevent a wipe.
That being said, well done! You have survived (yet again) another phase in the battle against Bahamut Prime. We’re now onto Phase 3, so stay tuned for the next article, FFXIV Gil hunters! Happy world boss hunting!