In the first part of our guide we showed new FFXIV Gil hunters how to deal with three main mechanics of the Melusine fight in the Second Coil of Bahamut Turn 2 raid. Here in part two of the guide, we will go over the rest of the mechanics of the fight. While they are individually simple, put together, they can make for a very hectic encounter.
AoE attacks FFXIV Gil hunter’s need to avoid
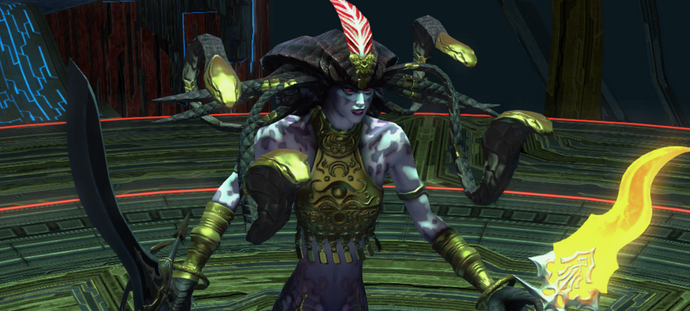
While your Final Fantasy XIV Gil hunter is busy with Cursed Voice and Cursed Shriek, know that Melusine will be busy trying to kill you. She does this directly through two skills, Circle Blades and Circle of Flames. The first is a point blank AoE skill that deals considerable damage to melee characters. The second skill is a targeted AoE attack the boss often uses against ranged DPS. Be prepared to dodge and keep cheap FFXIV Gil around for the repairs after the fight.
Killing Adds to add FFXIV Gil
As Melusine’s health starts to drop, she will start summoning adds. The first batch of adds are Lamia Deathdancers. They have a cleave attack as well as a point blank AoE similar to Circle Blades. There are three of these adds, but they spawn one at a time. Make sure to focus them down quick. You may need to buy FFXIV Gil for better equipment, if you can’t kill them quickly.
The second batch of adds are Lamia Fatedealers. These are four archers that fire targeted AoE attacks in the form of arrow barrages. All four adds spawn at the same time and can deal a large amount of damage rather quickly. Healers should be prepared for this, while DPS should focuses them down quickly.
The last add is a Lamia Prosector. Aside from dealing heavy damage, it can also use Petrifaction. This will petrify all characters that can see the add. As such, turn your character physically away when the skill is used. Once this add dies, Melusine will be able to use the Petrifaction ability.
Saving your FFXIV Gil from evil purple zones
During the fight with Melusine, players will notice three concentric rings in the room. These periodically glow purple. This is another mechanic of the fight. These areas deal damage over time and will instantly kill characters that are standing inside them when they explode. Thankfully they have a fixed pattern so it is easy to avoid standing the in the active ring.