One of our previous guides covered the first boss of the Syrcus Tower raid. Today, we will look at the second boss of the raid and how to defeat and get cheap FFXIV Gil from it. Make sure to buy FFXIV Gil as you will certainly need to repair your gear after this fight.
FFXIV Gil hunters versus Wrights
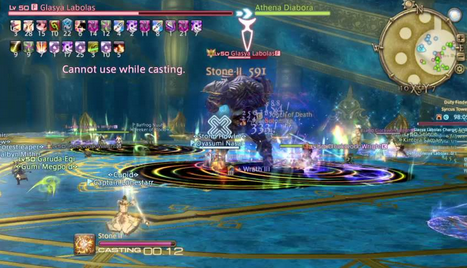
The next boss of the Syrcus Tower raid the Final Fantasy XIV Gil hunters will face is Glasya Labolas. During the fight, he will summon Wrights. These adds will do one of two things: buff the boss or buff themselves. It goes without saying that they need to be killed to prevent the boss from getting too powerful. Unfortunately, they will cast a pointblank AoE that makes them invulnerable. Thankfully, it can be countered by having a player enter the AoE. This will stun both the Wright and the character. At this point, other players can focus down the now vulnerable add. Repeat this quickly against all the adds summoned.
Lasers, pads and FFXIV Gil
Once all the Wrights have been dealt with, the next phase of the fight begins. In it, three pillars will emerge and fire a laser at the boss. While Glasya Labolas is being hit by the laser, he will be invulnerable. During this phase, Clockwork Squires will also spawn. When these cross the beams they will redirect it. To remove the boss’ invulnerability, kill the adds such that they will redirect the beam towards alliance pillars located in the map. Doing so will activate jump pads that send FFXIV characters towards the platforms surrounding the central room.
Gaining access to the platforms is critical to this boss fight. This is because the platforms are the only way to avoid the boss’ Deathstream ability. Once cast, this will hit all characters in the central room and kill them.
Clearing platforms for FFXIV Gil
Once the boss has cast Deathstream, adds will spawn on the platforms. These will then charge up and cover them with an electric field that deals damage over time. Additionallly, the Deathstream on the central room will not go away until the mobs have been dealt with. Once all of them have been killed, the boss will return to the Wrights summoning phase and the mechanics repeat.