You all know how difficult Final Fantasy XIV Gil is to come by, but if it’s generous amounts of cheap FFXIV Gil and loot you want, defeating world bosses is the best option—though not necessarily the easiest. But no worries! We’ll guide you through the different bosses in Final Fantasy XIV! Find out more about this boss in the article below!
Introduction – Angra Mainyu for FFXIV Gil Hunters
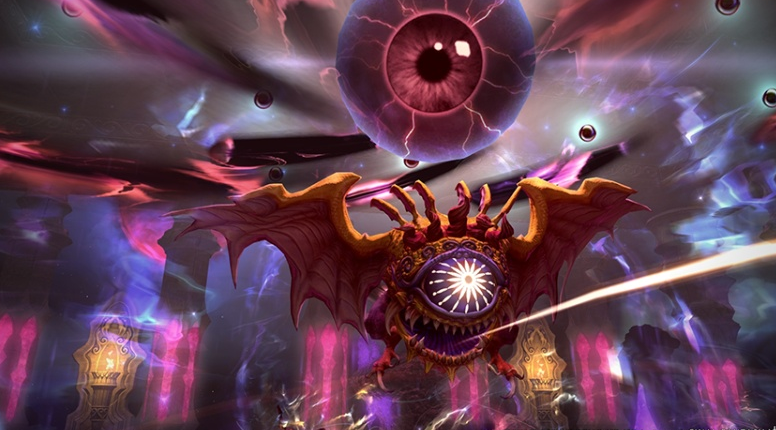
Angra Mainyu is the first boss of The World of Darkness, also part of the Crystal Tower dungeon. Angra Mainyu is a flying eyeball-like fiend based from Final Fantasy III’s Ahriman.
He has a variety of attacks that can affect the entire raid, often inflicting status ailments that will impair any careless player’s movement. Just make sure healers, as well as everyone in the party, have enough pots that can lift status ailments when they buy FFXIV Gil.
Abilities – Angra Mainyu for FFXIV Gil Hunters
- Stare– Fires a beam directly in front of him. This will deal heavy damage to anyone who isn’t tanky enough. Other squishy members like healers and mages should avoid being directly in front of Angra Mainyu.
- Double Vision– This affects the entire area, but the effect is split into two down the middle. On the side marked red, players are hit with Ireful Gaze, while those on the blue side are hit with Sullen Gaze. These attacks inflict a status effect that increases damage from consecutive hits. To counter this, players much switch sides as one cancels out the other.
- Mortal Gaze– Using both the eye in front, as well as a concealed “eye” in his back, he can inflict Doom on the entire raid. This attack can be avoided by turning around before it goes off. Those who do get hit have ten seconds to remove it on glowing sigils in the area.
- Roulette– Places a finger that affects the area in a cone, which rotates around the area. Four hourglasses will appear; if all are destroyed, the roulette is locked into the last one’s section, enabling players to easily avoid instant death.
- Level 100 Flare– Places a red orb over one player, with several others linked by a tether and a red ring indicated the range. If the total amount of players in the area of effect is an even number (i.e. total levels are a multiple of 100), they will be incinerated. Otherwise, it will have no effect.
- Level 150 Death– Places a purple orb over one player, with several others linked by a tether and a purple ring indicated the range. If the total amount of players in the area of effect is a multiple of three (adding everyone’s level together), they will suffer instant death. Same as Level 100 Flare, it will have no effect.
In addition, two Angra Mainyu’s Daewa will spawn after Roulette ends. They use the standard Ahriman battle strategies such as the cone-based paralysis from Dread Gaze, as well as Eyes on Me. They should be eliminated as quickly as possible. Eyes on Me should be interrupted before it is casted, otherwise will deal a large amount of damage to most of the raid.
Dealing with Adds and Tactics – Angra Mainyu for FFXIV Gil Hunters
There are spots on the ground that light up to remove the debuff, Doom. If you get hit by Doom when he casts Mortal Gaze, jump in them to remove it. The alternative is to not have your character face him as he casts. During the fight, two types of adds will spawn.
Kill the hourglasses one at a time. Mark them 1 – 2 – 3 and remember not to mark the fourth. Combining your power on killing these will make it easier to notice when the boss will stop his one hit KO attack.
As you kill the hourglasses, a finger will tick around the room. If you take too long or kill the last hour glass, it will stop on its last position and cast an instant hit KO attack on anyone stunned inside. To avoid this, make sure everyone knows what the last hourglass is so when it dies, they can dodge the last selected area.
The Eye adds that spawn need to be taken away from groups and killed. Off tanks need to stun Eye for an Eye. When these adds die, an invisible AOE will damage people around it.
As the fight goes on, the boss will cover the room in a dark and light spell. Each time this is cast alternate which color you stand on to stop yourself from taking too much damage from particular attacks. In the event that some members are downed, simply revive them with pots you bought with Final Fantasy XIV Gil.